Optionally, you can configure an alert threshold database connection, enable alerts and modify default alert notification settings, enable alert persistence to save the alerts to the database, store alert history to a history database, and define a history table name prefix to help differentiate alert history data between multiple data servers. All alert setup for RTView Enterprise Monitor (On-Premise) is configured in RTView Central. See the RTView Enterprise Monitor Configuration Guide for more information.
Before You Get Started
- You need to know the URL, driver, and classpath to be used for the alert database connection (if you do not want to use the default database connection).
- If configured, you need to know Username/Password for your connection (if configured).
- You must have downloaded and installed RTView Central Server (RTViewCentral_<version>.zip), and it must be up and running. See RTView Enterprise Monitor Installation Guide for more information.
Enabling an Alert Threshold Database
You can either use the default alert threshold database (HSQLDB) or you can use your own database. See the following for more information:
- Configuring Alerts for RTView Enterprise Monitor (On-Premise), Version 5.2 (Optional)#Enabling the Default Database (HSQLDB)
- Configuring Alerts for RTView Enterprise Monitor (On-Premise), Version 5.2 (Optional)#Defining an Alert Threshold Database Connection
Enabling the Default Alert Threshold Database (HSQLDB)
If you want to use the default database, perform the following steps:
- Navigate to <default directory>/projects/rtview_server.
- Edit the rtvservers.dat file.
- Enable (remove #) from the following line to use the default database:
default . database rundb
No further steps are needed. If you want to use a different database, see Configuring Alerts for RTView Enterprise Monitor (On-Premise), Version 5.2 (Optional)#Defining an Alert Threshold Database Connection for more information.
Defining an Alert Threshold Database Connection
Note: This step is optional. RTView Central is delivered with a default HSQL database. You only need to define a database connection if you do not want to use the default HSQL database. To use the default database connection, see Configuring Alerts for RTView Enterprise Monitor (On-Premise), Version 5.2 (Optional)#Enabling the Default Database (HSQLDB).
Perform the following steps to create an Alert Threshold Database connection:
- Open a browser, access the RTView Configuration Application for RTView Central Servers (Enterprise Monitor) using http://localhost:10070/rtview-central-rtvadmin, and log in using rtvadmin/rtvadmin as the username/password.
The RTView Configuration Application displays.
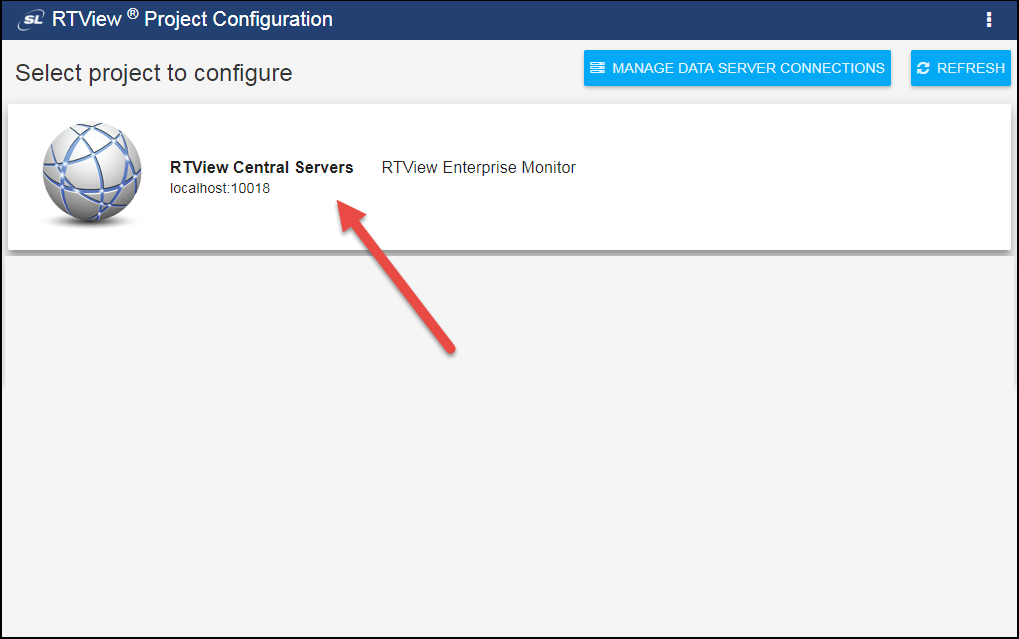
- Click the RTView Central Servers (RTView Enterprise Monitor) project.
- Navigate to the RTView Configuration Application > Server Configuration > Databases > Connections tab.
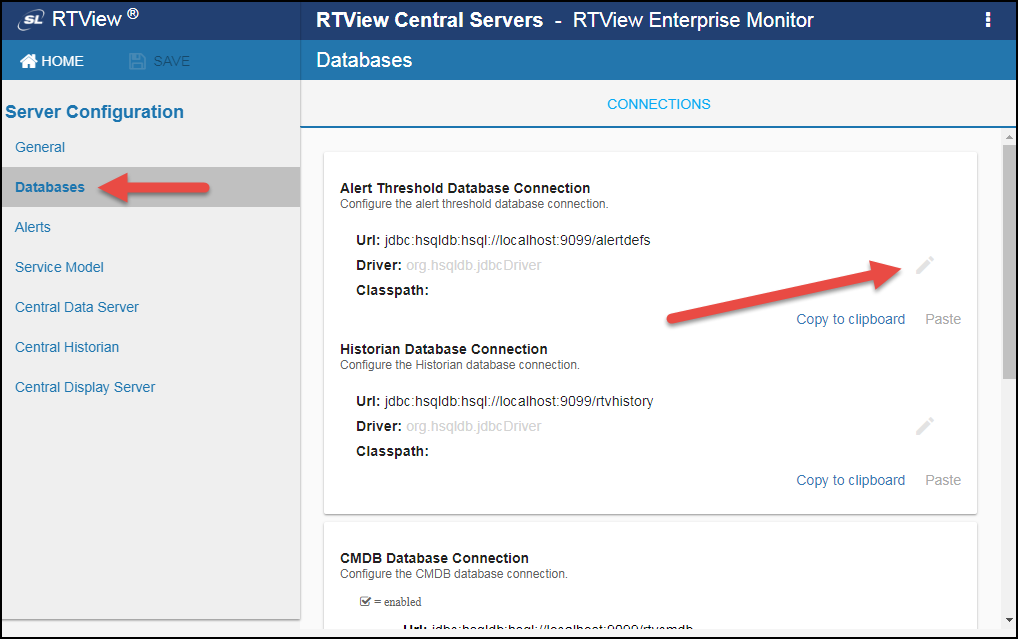
- Click the "pencil" icon inside the Alert Threshold Database Connection region.
The Edit Alert Connection window displays.
Note: You can click on the Copy to clipboard and Paste links below the "edit box" prior to creating the connection to automatically include the default text into the window.
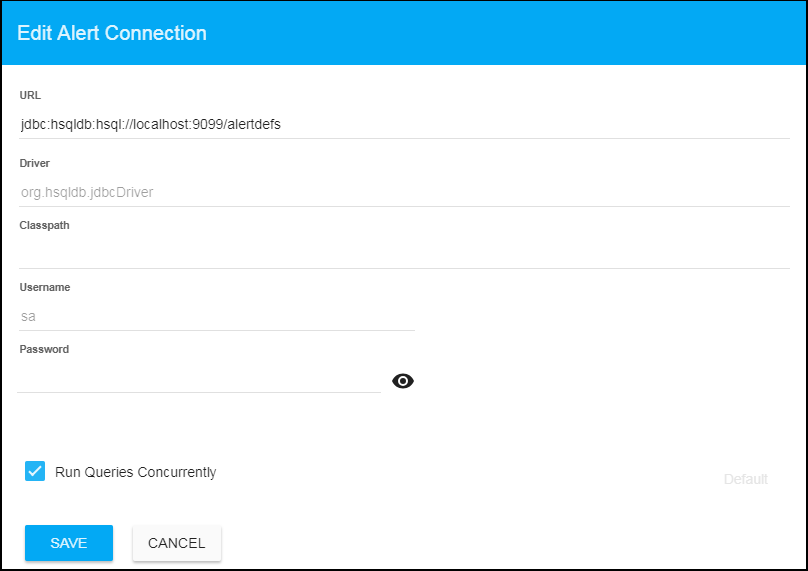
- Add the following connection details and click SAVE where:
URL: The complete URL for the database connection.
Driver: The full name for the driver.
Classpath: The complete classpath for the jar location.
Username: The username is used when creating the connection. This field is optional.
Password: This password is used when creating the connection. This field is optional. By default, the password entered is hidden. Click the ![]() icon to view the password text.
icon to view the password text.
Run Queries Concurrently: When selected, database queries are run concurrently.
Modifying Default Alert Notification Settings
The following settings determine whether or not alerts are enabled and when alert notifications are sent.
To modify the default alert notification settings:
- Navigate to the RTView Configuration Application > Server Configuration > Alerts > Alerts tab > Notifications region.
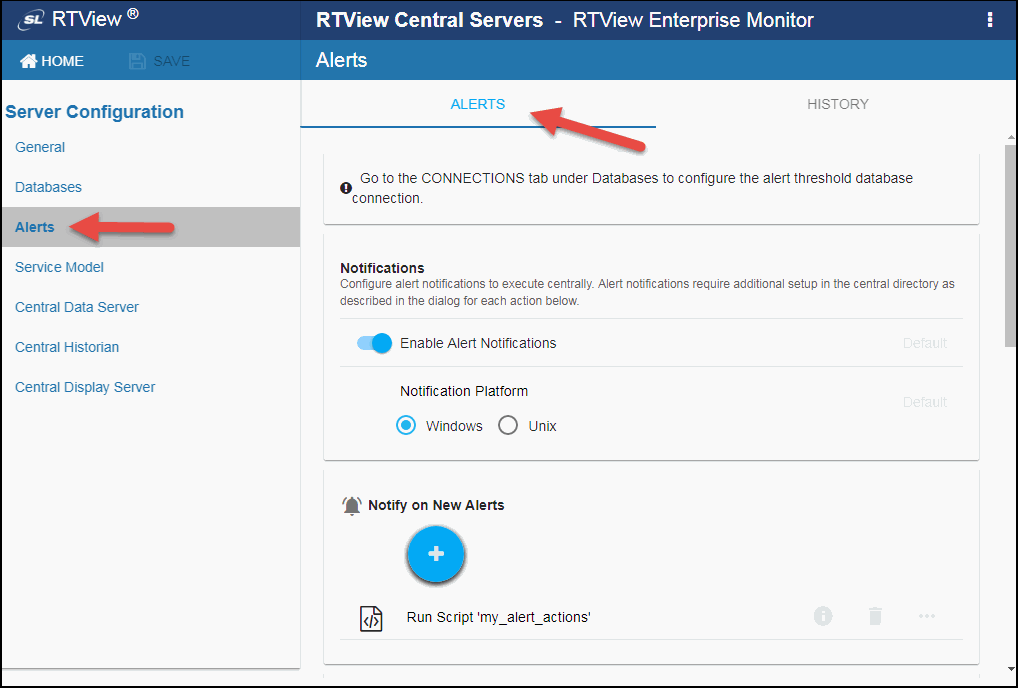
- Toggle on Enable Alert Notifications and select the Notification Platform type (Windows or Unix).
- Select an alert event that you want to notify on by clicking the
 button next to the desired option.
Notify on New Alerts: A notification is executed every time a new alert is created.
Notify on First Severity Change: A notification is executed the first time the Severity changes for each alert.
Notify on Cleared Alerts: A notification is executed every time an alert is cleared.
Periodically Renotify on Unacknowledged Alerts: Enter the Renotification Interval (number of seconds). A notification is executed for each unacknowledged alert per the interval you specify here. If the Renotification Interval is greater than 0 and no actions are defined, the New Alerts action will be used for renotifications.
- Click SAVE to close the dialog and SAVE (in title bar) to save your changes.
Note: Some alert notification actions require additional setup as described in the dialog for each action. See the Configuring Alerts for RTView Enterprise Monitor (On-Premise), Version 5.2 (Optional)#Alert Events section below for descriptions, details on the associated dialog, and additional setup for each action.
Alert Events
Run a Script 

This alert notification action executes the following script in the projects/rtview-server directory:
my_alert_actions.bat/sh – New and First Severity Change
my_alert_actions.cleared.bat/sh – Cleared
my_alert_actions.renotify.bat/sh – Periodically Renotify
This action can only be added once per notification type. In addition to selecting this action in the RTView Configuration Application, you must also modify the appropriate script to execute the actions for your notification. This script has access to the following fields from the alert: Alert Name, Alert Index, ID, Alert Text, and Severity.
Execute Java Code 
This alert notification action allows you to implement your alert notification actions using Java code. It executes the my_alert_notification.$domainName.$alertNotifyType.$alertNotifyCol command in your Custom Command Handler and passes the row from the alert table that corresponds to the alert. This action can only be added once per notification type. In addition to selecting this action in the RTView Configuration Application, you must also modify the custom command handler to execute the actions for your notification. A sample custom command handler is included under projects/custom. It prints the alert notification to the console. You will modify this command handler to implement your own notification actions.
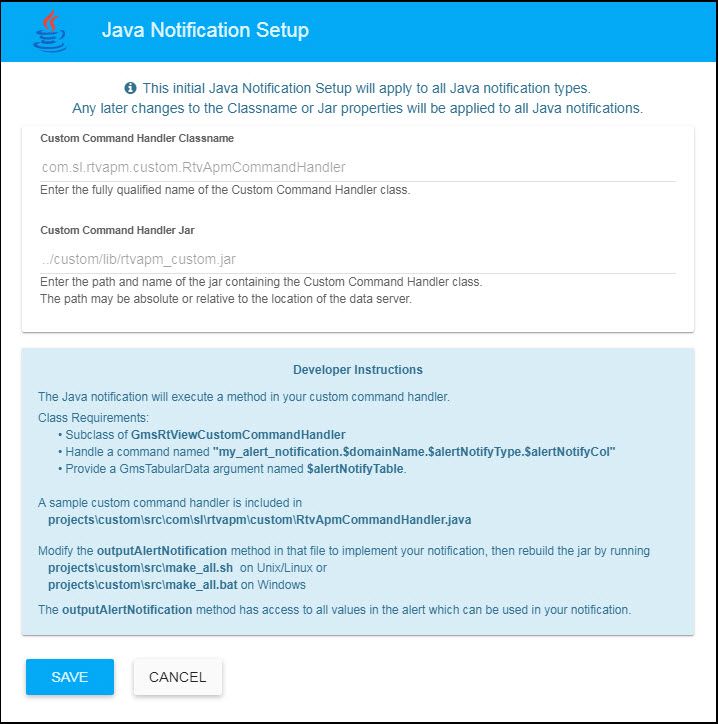
Make the following entries:
Custom Command Handler Class Name: Enter the fully qualified name of the Custom Command Handler class. This defaults to the sample Custom Command Handler in the projects/custom directory.
Custom Command Handler Jar: Enter the path and name of the jar containing the Custom Command Handler class. The path may be absolute or relative to the location of data server. This defaults to the sample Custom Command Handler in the projects/custom directory.
Note that if you can only have one custom command handler per Data Server, so changing these settings for one notification event will change them for the rest of the notification events.
Customizing the Custom Command Handler
The source for the Custom Command handler is provided in the RtvApmCommandHandler.java file, located in the projects\custom\src\com\sl\rtvapm\custom directory. By default, the handler prints the alert data to standard output. To change this behavior perform the following steps:
a. Open the RtvApmCommandHandler.java file.
b. Modify the OutputAlertString method as needed. You can replace this method with your own if you modify the invokeCommand method to call it, and your method accepts the same arguments as OutputAlertString.
c. Save the RtvApmCommandHandler.java file.
d. Compile RtvApmCommandHandler.java and rebuild rtvapm_custom.jar using the supplied script (make_all.bat or make_all.sh) in projects\custom\src directory.
Send Emails 
This alert notification action sends an email. This action can be added multiple times per notification type. No additional setup is required beyond filling in the Add Email Notification dialog in the RTView Configuration Application.
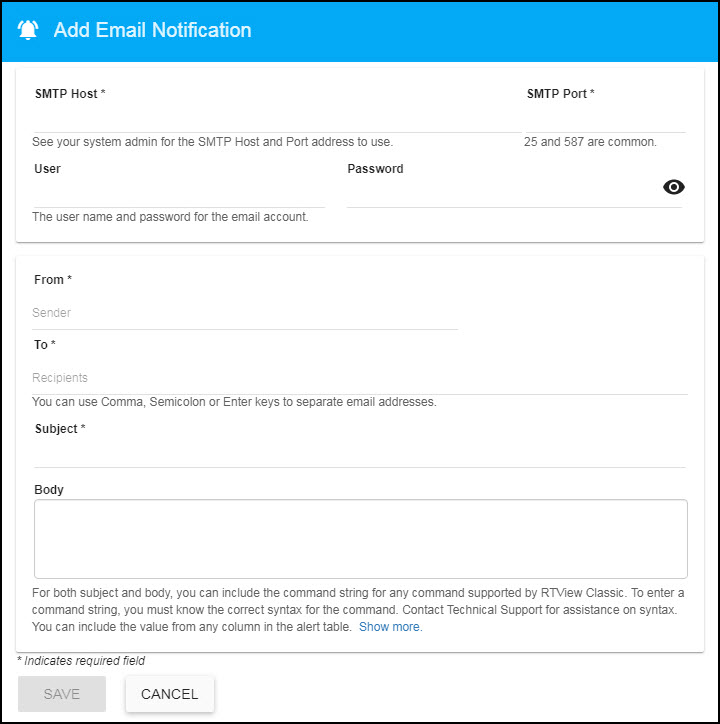
Make the following entries:
SMTP Host: The SMTP host address. This is required. Consult your administrator.
SMTP Port: The SMTP port number. This is required. Consult your administrator.
User: The user name for the account from which you are sending the email. This is optional.
Password: The password for the account from which you are sending the email. This is optional.
From: The email address to which to send the email. This is required.
To: The email address to which to send the email. This is required and may contain multiple entries.
Subject: The subject for the email. This is required. You can include the value from any column in the alert table in your subject. Click the Show More link at the bottom of the dialog to see the alert column values you can use in the Subject.
Body: The body of the email. This is optional. Click the Show More link at the bottom of the dialog to see the alert column values you can use in the Subject.
Send an SNMP Trap 
This alert notification action sends an SNMP Trap as described in rtvapm/rtview/lib/SL-RTVIEW-MIB.txt. This action can be added multiple times per notification type. No additional setup is required beyond filling in the Add SNMP Trap Notification dialog in the RTView Configuration Application.
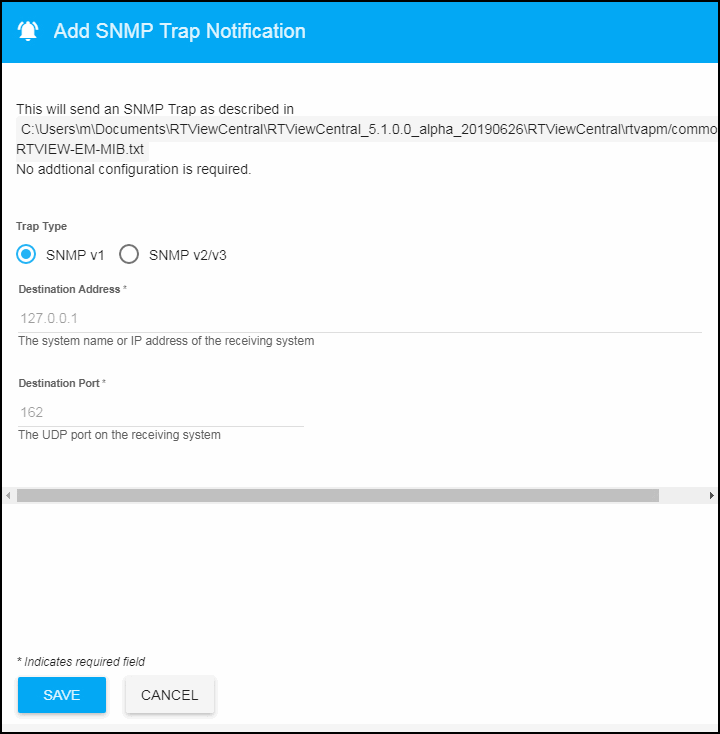
Make the following entries:
Trap Type: Select the SNMP version of the trap. This is required.
Destination Address: The system name or IP address of the receiving system. This is required.
Destination Port: The UDP port on the receiving system. This is required.
Community Name: (This field is visible when Trap Type v2/v3 is selected.) The SNMP v2 Community Name string. This is required.
Run Command String 
This alert notification action executes a specified command. This action can be added multiple times per notification type.
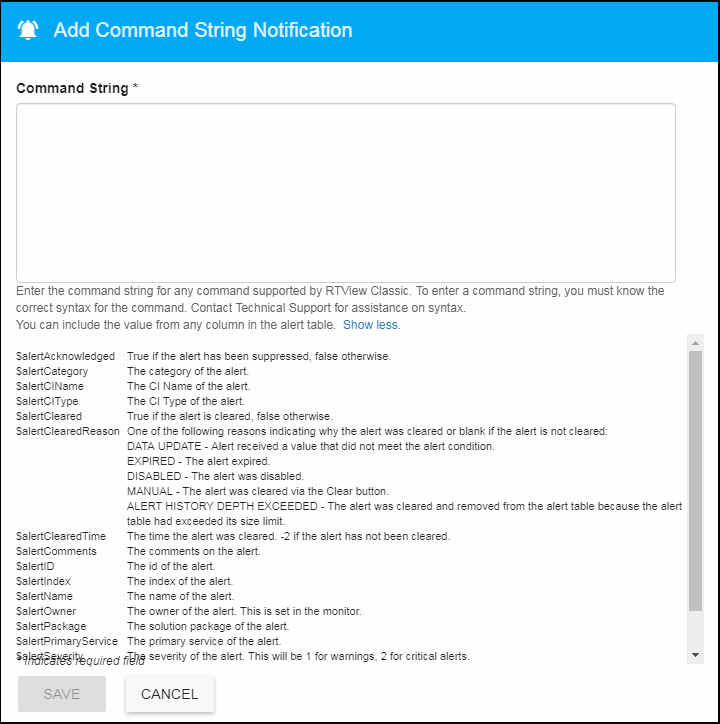
Make the following entry:
Command String: Enter the command string for any command supported by RTView Classic. To enter a command string, you must know the correct syntax for the command. Contact Technical Support for assistance on syntax. You can include the value from any column in the alert table using the syntax in the Show More link.
Send Notifications based on a Conditional Filter 
This alert notification action alert allows you to execute different actions for different alerts based on information in the alert. For example, you can configure EMS alerts to send emails to your EMS team and Solace alerts to send emails to your Solace team. This action can be added multiple times per notification type.
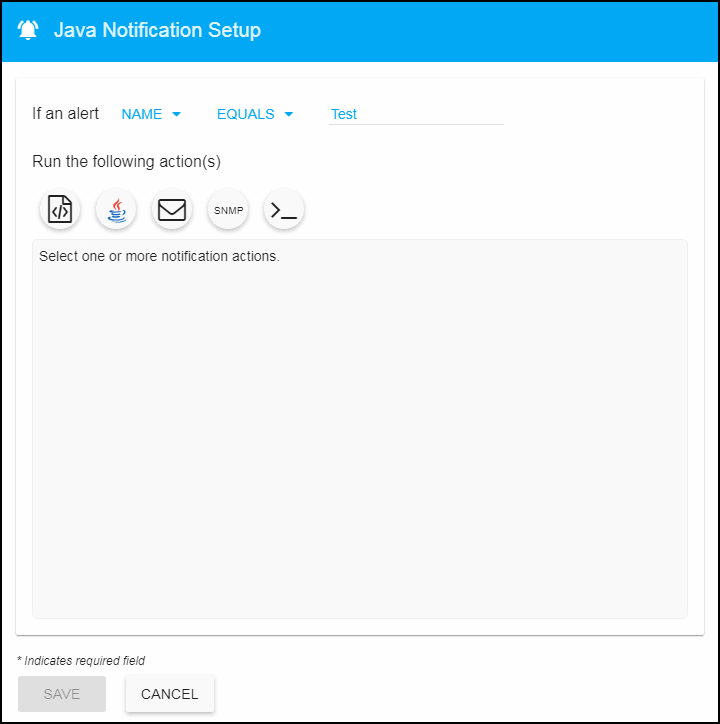
To create a condition, make the following entries:
Alert Field: Select an alert field: (Alert) Name, (Alert) Index, Category, CI Name, Owner, Package, Primary Service, or Severity. This is required.
Operator: Select one - EQUALS, DOES NOT EQUAL, STARTS WITH, ENDS WITH, or CONTAINS. This is required.
Value: Enter the value to which to compare the Alert Field. Cannot contain wildcard characters. This is required.
Action(s): Select one or more actions to execute when this condition is met (see Configuring Alerts for RTView Enterprise Monitor (On-Premise), Version 5.2 (Optional)#Run a Script, Configuring Alerts for RTView Enterprise Monitor (On-Premise), Version 5.2 (Optional)#Execute Java Code, Configuring Alerts for RTView Enterprise Monitor (On-Premise), Version 5.2 (Optional)#Send Emails, Configuring Alerts for RTView Enterprise Monitor (On-Premise), Version 5.2 (Optional)#Send an SNMP Trap, or Configuring Alerts for RTView Enterprise Monitor (On-Premise), Version 5.2 (Optional)#Run Command String for more information.
Enabling Alert Persistence
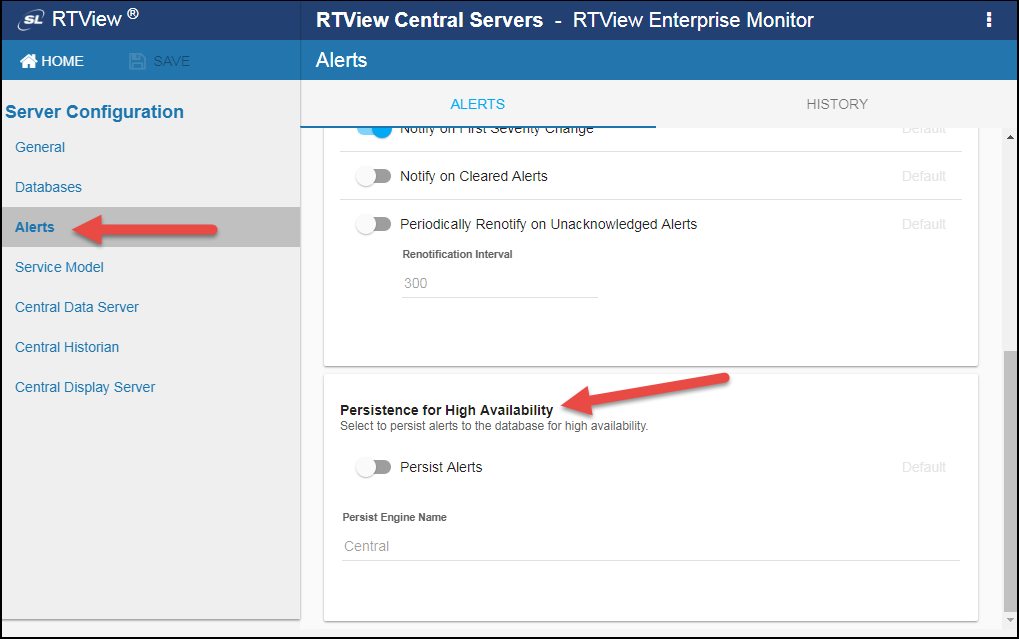
The Persist Alerts option saves the alerts to the database for high availability purposes.
To enable the Persist Alerts option:
- Navigate to the RTView Configuration Application > Server Configuration > Alerts > Alerts tab > Persistence for High Availability region.
- Select the Persist Alerts toggle (blue is enabled, gray is disabled).
- Optionally, modify the Persist Engine Name if you want to use a name other than the default (Central).
Storing Alert History
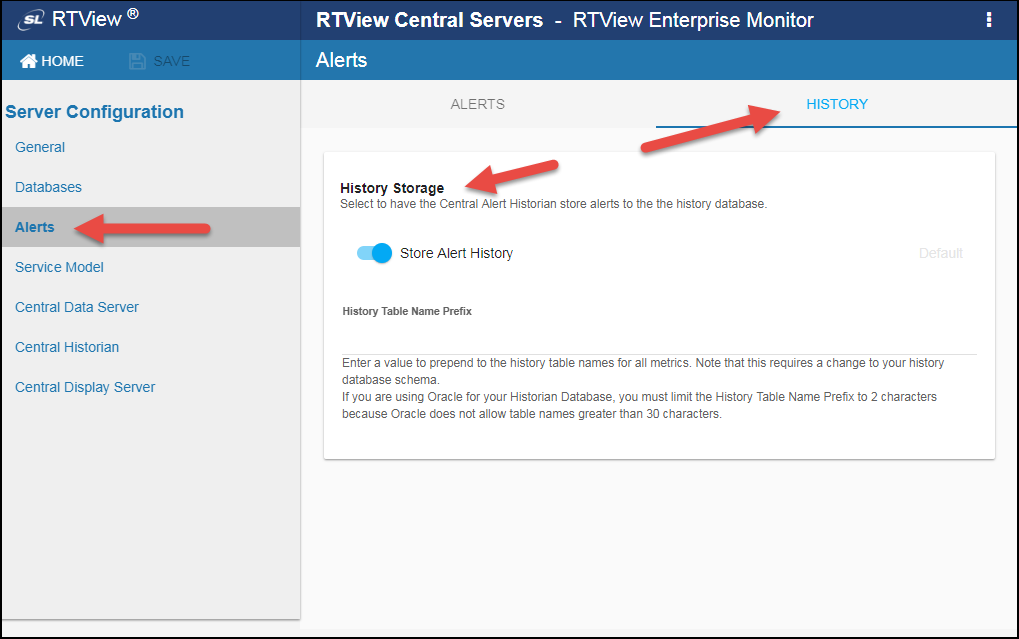
Enabling the Store Alert History option stores the alerts in the History database. This value is used in the Alerts Table (which makes it easier to find the alerts). See Configuring the Historian Database for more information.
To enable the Store Alert History option:
- Navigate to the RTView Configuration Application > Server Configuration > Alerts > History tab > History region.
- Select the Store Alert History toggle (blue is enabled, gray is disabled) to enable this option.
- You can also specify a History Table Name Prefix, which allows you to define a prefix that will be added to the database table names so that the Monitor can differentiate history data between data servers when you have multiple data servers with corresponding Historians using the same solution package(s) and database. In this case, each Historian needs to save to a different table, otherwise the corresponding data server will load metrics from both Historians on startup. Once you have defined the History Table Name Prefix, you will need to create the corresponding tables in your database as follows:
- Locate the .sql template for your database under rtvapm/(Solution Package Name)/dbconfig and make a copy of it
- Add the value you entered for the History Table Name Prefix to the beginning of all table names in the copied .sql template
- Use the copied .sql template to create the tables in your database
Saving Your Changes and Restarting the Data Server
Before your changes can take effect, you must save your changes and restart your data server. To do so:
- Click the SAVE button in the upper left hand corner of the window.

The  button displays in the upper right-hand corner of the window.
- Click the
 button to restart the data server.
Troubleshooting
If emails are not being sent, try the following troubleshooting steps:
- In the my_alert_actions.sh script, uncomment the ‘echo’ line
#echo "----- Alert command script executed: DOMAINNAME=$DOMAINNAME, ALERTNAME=$ALERTNAME, ALERTINDEX=$ALERTINDEX, ALERTTEXT=$ALERTTEXT, ALERTID=$ALERTID, ALERTSEVERITY=$ALERTSEVERITY #####"
- Check that the alerts are included in the dataserver.log file in /… projects/rtview-server/logs directory.
If you see entries in the log file such as:
“CmdOut for ./my_alert_actions.cleared.sh SL-SOLMON-1 +SolMsgRouterInboundByteRateHigh+ "+sgdemo+" +1269+ +1+ +High Warning Limit exceeded, current value: 45662.48734522234 limit: 1.0 - ----- Alert command script executed: DOMAINNAME=SL-SOLMON-1, ALERTNAME=SolMsgRouterInboundByteRateHigh, ALERTINDEX=sgdemo, ALERTTEXT=High Warning Limit exceeded, current value: 45662.48734522234 limit: 1.0, ALERTID=1269, ALERTSEVERITY=1 #####”
...then my_alert_actions.sh script is being executed.
If there are no entries in the log file, test that the script contains a valid command and a valid email destination.
Execute the command you created on the command line and make sure that the appropriate email notification was received. If not, then email alerts are not being received. Re-check your syntax and credentials and contact your email administrator.
If you see entries similar to the following in the dataserver.log:
CmdOut for ./my_alert_actions.sh SL-SOLMON-1 +SolMsgRouterInboundByteRateHigh+ "+solshare3+" +1386+ +1+ +High Warning Limit exceeded, current value: 50.28685457720129 limit: 1.0 - {
"id": "<20190227022659.1.E925C2FAE5F2C672@slsandbox.com>",
"message": "Queued. Thank you."
...then email alerts are being sent and you should contact your email administrator to understand why they are not being received.