RTView DataServer for TIBCO Quick Start Guide, Version 5.3 (draft)
The Quick Start Guide will help you set up RTView DataServer for TIBCO with basic configuration. For further instructions and details on advanced configuration, refer to.....
Perform all the listed steps before getting started.
Before Getting Started
Install Java 1.8 (or newer). and know the installation directory path.
- Download the RTViewDataServerTIBCO_xxxx.zip.
- Have access to the correct full path to the directory containing the TIBCO .jar files for each of your solution packages.
- Have access to the following info related to the connection settings for your solution packages:
| Connection Type | Connection Settings |
|---|---|
| TIBCO ActiveMatrix | Connection Name, URL, and Username/Password |
| TIBCO ActiveSpaces | FTL connections |
| TIBCO ActiveSpaces2 | Metaspace to be monitored, Domain Name, Space(s) to be monitored, Discovery URL, Listen URL, Security Token File, and Identity Password |
| TIBCO Enterprise Message Service (EMSMON) | URLs for the EMS servers you want to monitor |
| TIBCO BusinessWorks (BWMON) | Either install the OSGi plugin in every AppSpace or enable the TIBCO Hawk MicroAgent in each AppSpace you want to monitor. |
| TIBCO BusinessWorks Version 5 (BWMON5) | BWMON5 monitoring must be done via TIBCO Hawk (enabled by default), but you also need to install the RTViewBWAgent plug-in microagent. If you enable JMX monitoring, you can have access to additional data such as CPU and Memory data. For BWSE engines, additional setup is needed to allow access to AMX Node data. |
| TIBCO Hawk connections (for BWMON and BWMON5) | Where Transport Type is EMS: Domain, Username/Password, and Agent(s). Where Transport Type is Rendezvous: Domain, Service, Network, Daemon, and Agent(s). |
| RTView Manager connections (BWMON5 only) | Name, Port, and Username/Password |
| TIBCO Adapters | Domain Name, Agent Name, and Method of Transport (EMS or Rendezvous) |
| TIBCO BusinessEvents | Engine Name, Host, TCP Port Number, BusinessEvents Engine Type, BusinessEvents Version for the engine, and Cluster Name where the engine resides. |
| TIBCO FTL | Primary URL for Connection, Failover URL for Connection, Number of Primary Cores, Number of Backup Cores, and Username/Password |
Registration
For registration purposes, a temporary license key is generated when installing RTViewDataServerTIBCO.
This temporary key will enable you to run RTView on different machines and platforms.
To receive a permanent key, please follow the instructions/ contact support.....
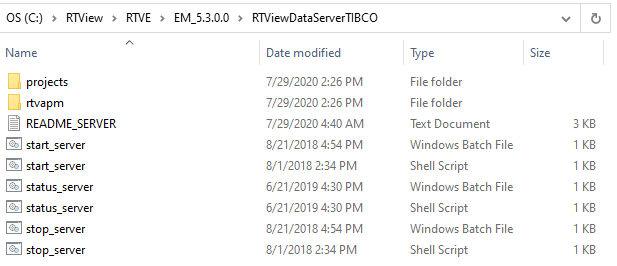
Installing and Starting the RTView DataServer for TIBCO
Extract All (Windows)/unzip (UNIX/Linux)Unzip the file to the directory of your choice. For UNIX/Linux, use unzip -a to unzip the file.
Open a command window and set the JAVA_HOME environment variable to point to your Java Installation.
EXAMPLE
export JAVA_HOME=/opt/Java/jdk1.7.0 (UNIX/Linux)
set JAVA_HOME=C:\Program Files (x86)\Java\jre1.8.0_201 (Windows)
Or, in Windows, you can set JAVA_HOME as an environment variable (in Control Panel > System >Advanced system settings), where it will then be used by all command windows when you double-click on a .bat file.
3. In the command window, navigate to the RTViewDataServerTIBCO directory and type:
start_server.bat (Windows)
./start_server.sh (UNIX/Linux)
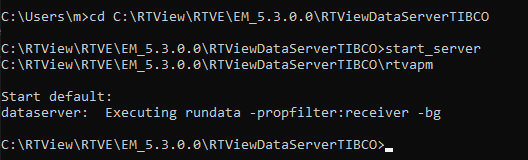
This script starts the Data Server on port 3278 with HTML Server (Eclipse Jetty, by default) on port 3270. If these ports conflict with other processes running on your system, you can change the first two digits of the ports by using -portprefix: and specifying the first two digits you want to use for the ports in the command line.
For example: start_server.bat -portprefix:44 (which would change the ports to 4478 for the Data Server and 4470 for HTML Server). If you want to save your port prefix, you can change the port prefix in the RTView Configuration Application (see the next section), or you can use -saveportprefix: command line argument (for example: start_server.bat -portprefix:44 -saveportprefix).
Configuring the Data Server
To create connections for the each of the solution packages using the RTView Configuration Application, you need to specify the directory path to your TIBCO .jar files:
- Open a browser and type:
http://localhost:3270/rtvadmin
The Authentication required dialog displays.

Log in using rtvadmin/rtvadmin as the username/password.
The RTView Configuration Application displays.
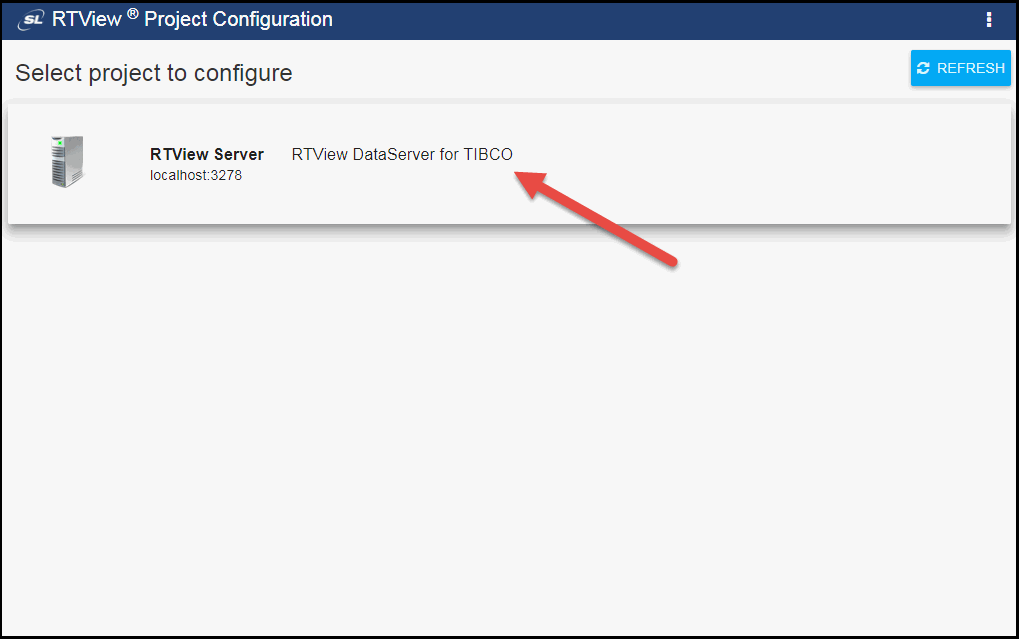
3. Click RTView DataServer for TIBCO.
The RTView Configuration Application displays with the General tab open.
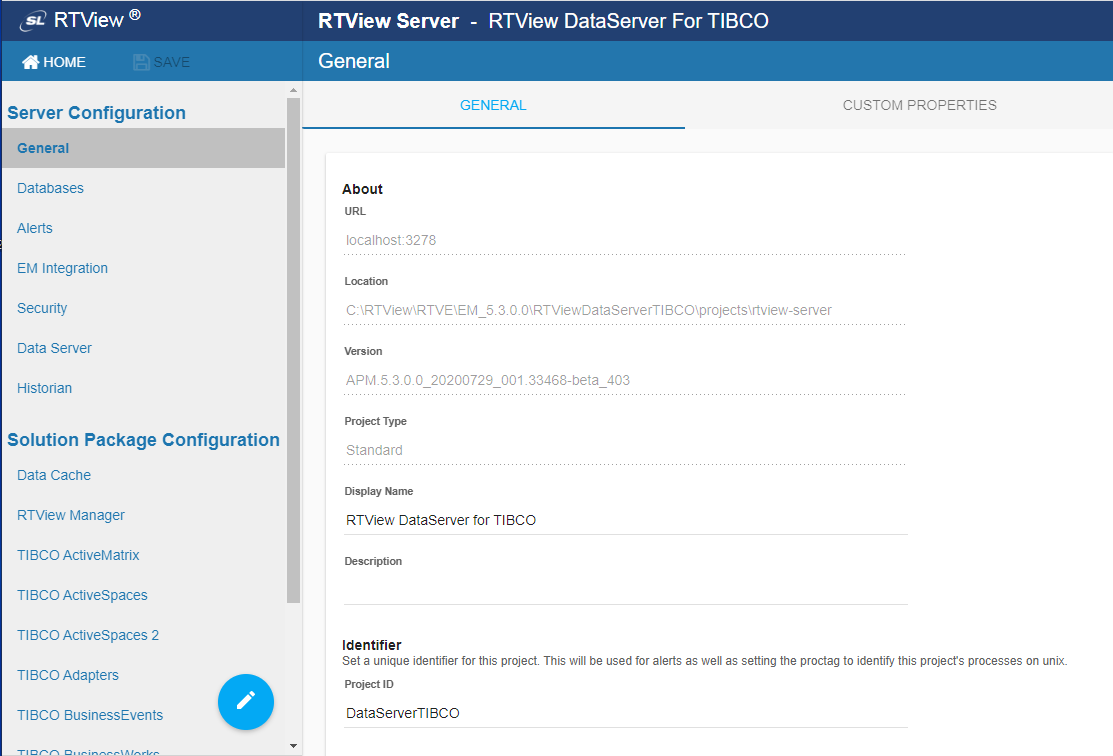
4. Under Solution Package Configuration, select the solution package you want to configure.
Configuration settings for the following solution packages:
TIBCO BusinessWorks – Contains configurations required for TIBCO ActiveMatrix BusinessWorks Versions 5 and 6, TIBCO Hawk (for Versions 5 and 6), and RTView Manager (required for Version 5 if JMX is enabled).
TIBCO Enterprise Message Service
Optionally, you can create a Historian Database Connection and configure the historian settings. See the link below for more information: Configuring the Historian Database (Optional)
- Alerts are configured in RTView Central Server. Click the link below to view details, and see the RTView Enterprise Monitor Configuration Guide for more information.
Connecting Your Data Server to Enterprise Monitor
To connect your data server to Enterprise Monitor (RTView Central):
- Click Server Configuration > EM Integration.
The EM INTEGRATION tab displays.
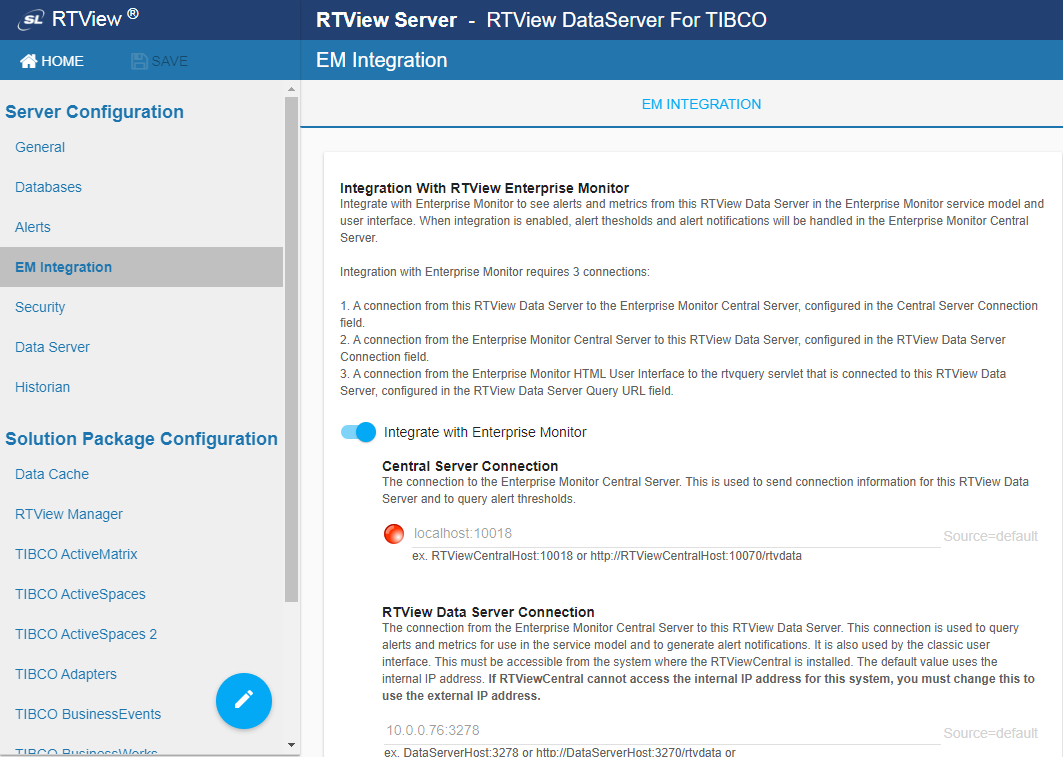
2. Click the Integrate with Enterprise Monitor toggle.
Saving and Restarting Your Data Server
- Once you have created all of your connections, click the SAVE button in the RTView Configuration Application.
2. Stop and restart the data server to make sure your changes have been saved

- Either click the
 button (in the upper right-hand corner of the window).
 - Or type the following in your installation directory in the command window:
stop_server.bat (Windows)
./stop_server.sh (UNIX/Linux)
start_server.bat (Windows)
./start_server.sh (UNIX/Linux)
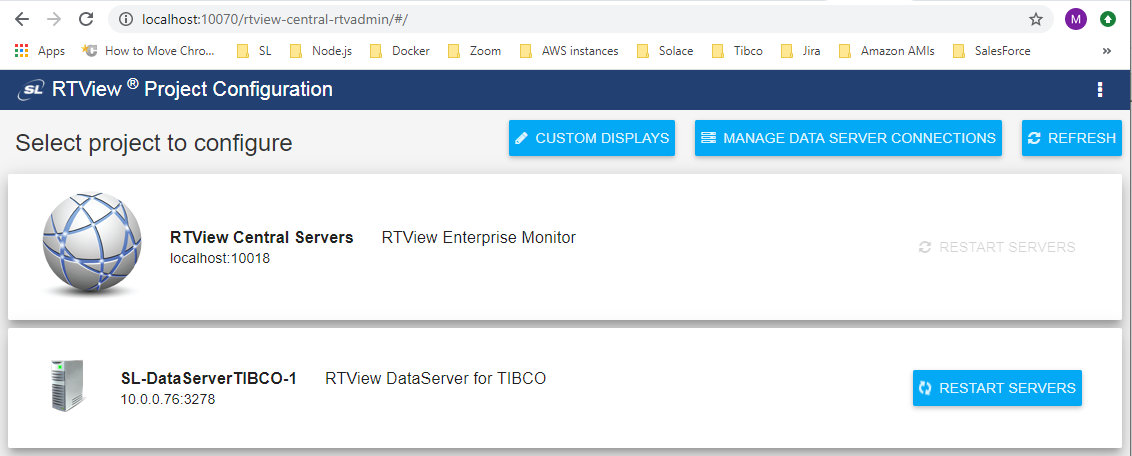
Verifying Your Setup
To verify your setup:
- Open a browser, access the RTView Configuration Application for RTView Central Servers (Enterprise Monitor) using http://localhost:10070/rtview-central-rtvadmin, and log in using rtvadmin/rtvadmin as the username/password.
Your data server (TIBCO_Data_Server, for our example) displays in the list below RTView Central Servers.
You can edit your data server connections/configurations in the RTView Configuration Application for RTView Central (http://localhost:10070/rtview-central-rtvadmin) or in the RTView Configuration Application for the RTView DataServer for TIBCO deliverable (http://localhost:3270/rtvadmin).