Connecting RTView Enterprise 4.x DataServers to RTView Cloud
This document describes the basic steps required to connect an existing Enterprise Monitor (EM) Data Server to RTView Cloud and view its data in the RTView Cloud displays. While there are many Solution Packages available in Enterprise Monitor 4.x, we will be using the TIBCO Enterprise Message Service data server as the example in this document.
Before You Get Started
Make sure that EM 4.x is up and running on premise with data servers gathering data.
You know the IP address or hostname of the host machine running EM 4.x.
Quick Start Steps
Log in to your RTView Cloud account at http(s)://rtviewcloud.sl.com.
If you do not have an RTView Cloud account, go to http(s)://rtviewcloud.sl.com/register and follow the instructions to create your account.
Note: If you log in using https, you must use https for your data server links as well. If you log in using http, you can use http or https for your data server links.
Once you have logged in, RTView Cloud displays.
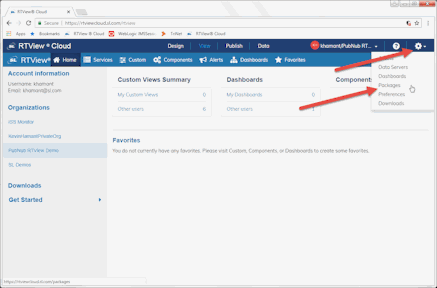
Click the cog wheel and select the Packages option.
The Solution Packages page displays.
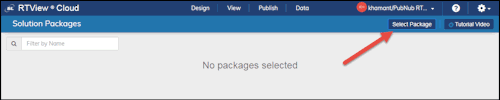
Click the Select Package button.
The Add Solution Package dialog displays.
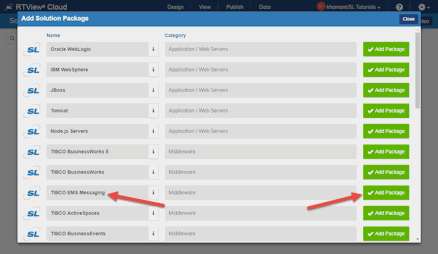
Scroll down and select the Add Package button next to the TIBCO EMS Messaging option, continue selecting desired solution packages, and click the Close button.
The selected solution packages are added to RTView Cloud.

Click the Data tab at the top of the menu.
The RTData Server List page displays.
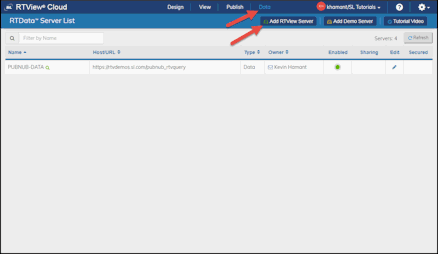
Click the Add RTView Server button, specify the following, and then click Save Added Servers:
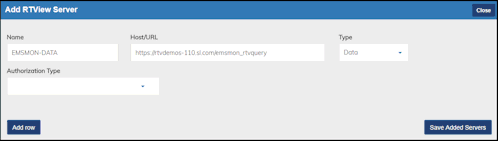
Name: Type the name you want to use for the server.
Host/URL: Enter the following: http://<IP Address/URL of the host>/emsmon_rtvquery
Shared: Click this toggle if you want to share access to this data server with others in your organization.
Type: Select Data.
Authorization Type: Do not select an Authorization Type. Leave this option empty.
Once saved, the newly added server displays in the RTData Server List.
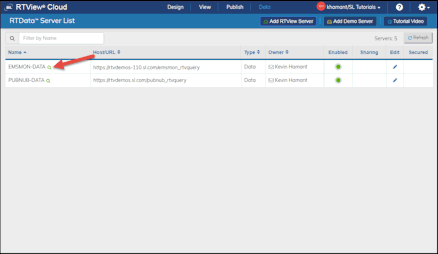
Click the green "magnifying glass" next to the server name.
The RTView DataServer - Cache Tables dialog displays.
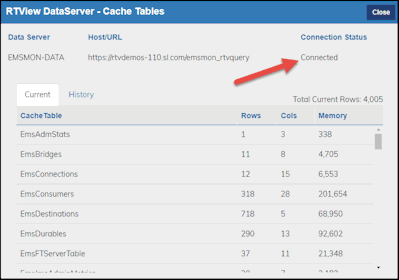
Verify that the Connection Status displays as Connected and that the associated cache tables are listed at the bottom of the dialog, and click the Close button on the dialog.
Note: A short delay might occur before the data server connects.
To view the incoming data in RTView Cloud displays, click View > Components > Middleware > TIBCO EMS Messaging and verify that your data server is selected in the Data Server drop down list.
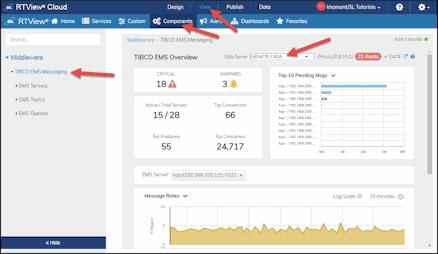
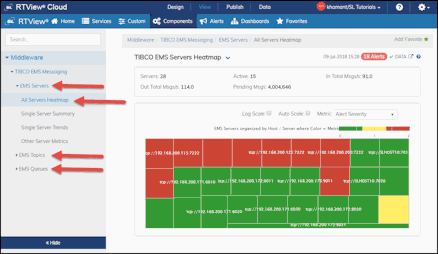
Continue clicking through the EMS Servers, EMS Topics, and EMS Queues views to see additional TIBCO EMS Messaging details. The example below shows the EMS Servers > All Servers Heatmap display.
Using EM Versions Prior to 4.x
For EM version 3.x, the following additional steps are required to display Solution Package data to the cloud:
If EM is set up and running, then copy the <solution package>_rtvquery.war files from the %RTVAPM_HOME%/<solution package>/webapps directory (for example: %RTVAPM_HOME%/emsmon/webapps/emsmon_rtvquery.war).
Paste the .war files for each solution package into your application server's webapps directory (for example: apache- tomcat-<version>/webapps)
Start Tomcat (run the startup script located in the bin directory).
In a browser, enter the following to display the connected status for the rtvquery servlet:
http://<IP address>:<port>/<solution package>_rtvquery/cache/test.jsp?test=1
Using EMS Messaging Service and port 8068 as an example:
http://<IP address>:8068/emsmon_rtvquery/cache/test.jsp?test=1
If connected status for the servlet is false, then you should confirm that the Host and Port fields are correctly configured. The Host and Port fields refer to the data server host machine and data server socket port, respectively. To modify the data server connection parameters, edit the $CATALINA_HOME/webapps/rtvquery/WEB-INF/classes/com/sl/rtvquery/rtvquery.properties file, where CATALINA_HOME refers to the Tomcat home directory, and check the following properties for host (DataServerHost) and port (DataServerPort):
# DataServerHost : This property defines the name of the host
# on which the RTView data server is running. If this
# is the same host as the app server, use localhost.
DataServerHost=localhost
# DataServerPort : This property defines the port number used
# by the Data Server. The default value is 3278
DataServerPort=3178