Configuring Node.js for DataCollector, Version 5.2
The Solution Package for Node.js is an easy to configure and use monitoring system that gives you extensive visibility into the health and performance of your Node.js node instances, node requests, and node processes. This section describes how to collect the Node.js data that you want to monitor.
Configuring Data Collection
This section describes the required configurations as well as the optional configurations available for the Solution Package for Node.js in the RTView Configuration Application.
Sending Data from Node.js Applications to the RTView DataServer for Infrastructure
The following steps are required so that data can be sent from your applications to the RTView DataServer for Infrastructure:
- Copy the RTViewDataCollectorInfra\ rtvapm\nodemon\agents\rtview-nodemon-<version>.zip file to your application's node_modules folder and unzip the file.
The rtview-nodemon folder is created within the node_modules directory.
- In a command window, cd to the rtview-nodemon folder and run npm install to install the modules required by the rtview-nodemon module.
- See the RTViewDataCollectorInfra\ rtvapm\nodemon\agents\rtview-nodemon\readme.txt file for additional information on how to use the modules in clustered and non-clustered applications.
Changing the Default Port (Optional)
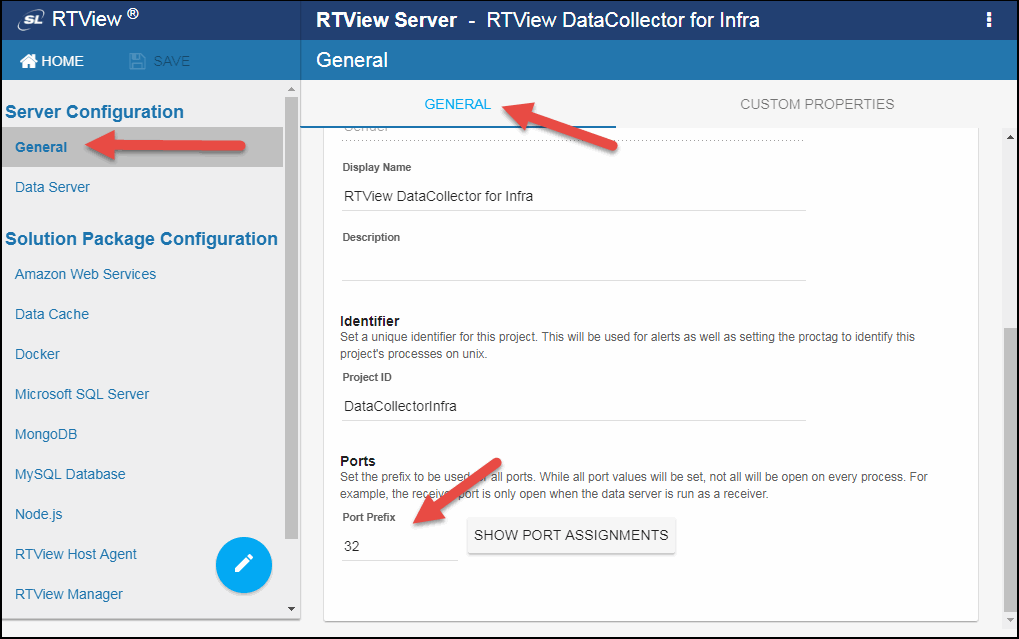
The default port used for data collection is defined in the “RTView Configuration Application” under Server Configuration > General > Ports.
To modify the default, perform the following:
- Open the “RTView Configuration Application” and navigate to Server Configuration > General > GENERAL (tab) > Ports.

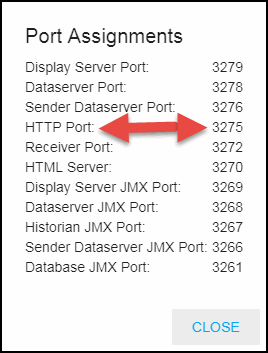
- Specify the Node.js rtvhttp data adapter port prefix to which you want to connect (to enable the Monitor to collect data). The last two numbers in the HTTP Port are automatically set to 75. You can click the SHOW PORT ASSIGNMENTS button to see the default port assignments. For example, if you specify 32 as the Port Prefix, then the combined port will be 3275.

- SAVE your changes in the RTView Configuration Application.

- To apply the changes you made, you must restart the data server, which can be done by clicking the
 button that appears once changes have been saved. Clicking this button automatically restarts the data server and takes you back to the projects page, which will require you to wait for a couple of minutes for the data server to restart. Once the data server has restarted, you can select the project again to verify your changes. Note that this process only restarts the data server.