Configuring TIBCO Adapters for Data Collector, Version 5.1.1
The Monitor uses TIBCO Hawk to monitor TIBCO Adapters by connecting to Adapter MicroAgents. You need to define a connection to Hawk in the RTView Configuration Application for each Hawk domain containing the adapter you want to monitor. You also need to define the names of the systems hosting the adapters that you want to monitor and add a cache configuration for each adapter that you want to monitor.
You will need the following information for each adapter in order to create the data connection:
- Domain: name of the domain.
- Agent Name: name of the agent defined when the adapter is set up.
- Method of Transport (Rendezvous (rvd) or EMS): RTView supports two types of connections to Hawk, Rendezvous (rvd) and EMS, which are defined when the adapter is set up.
Configuring the Data Connection
- Navigate to the Solution Package Configuration > TIBCO Adapter > CONNECTIONS tab.
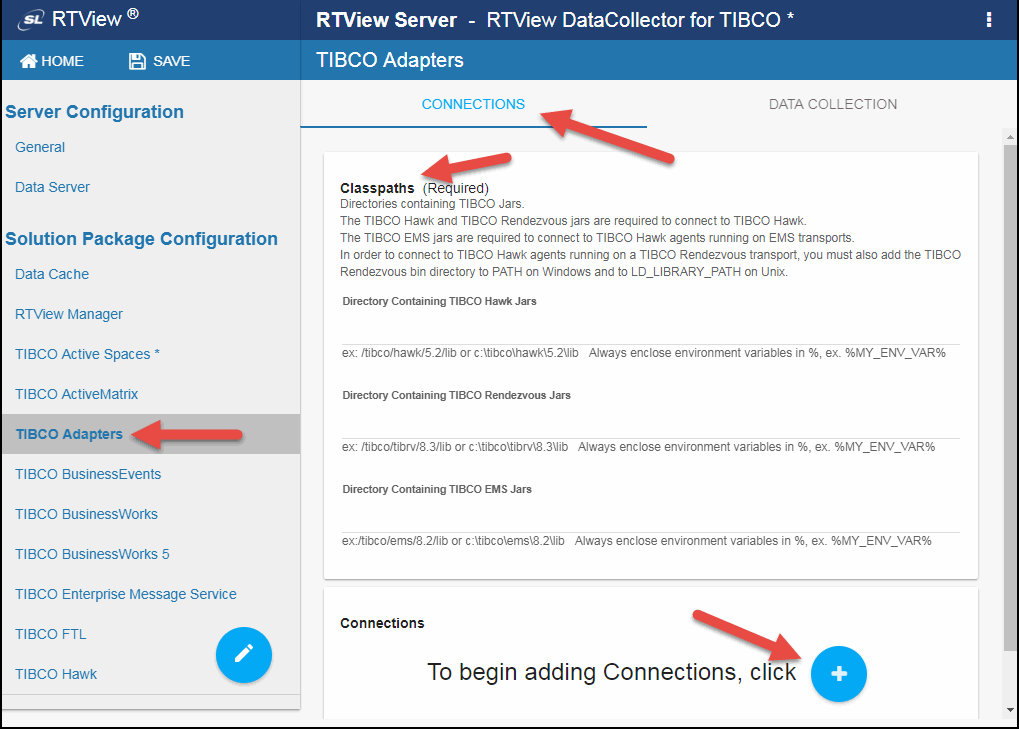
- In the CONNECTIONS tab, specify the Classpaths for the TIBCO Hawk jar files, the TIBCO Rendezvous jar files, and the TIBCO EMS jar files.
- Click the
 icon.
icon.
The Add Connection dialog displays.
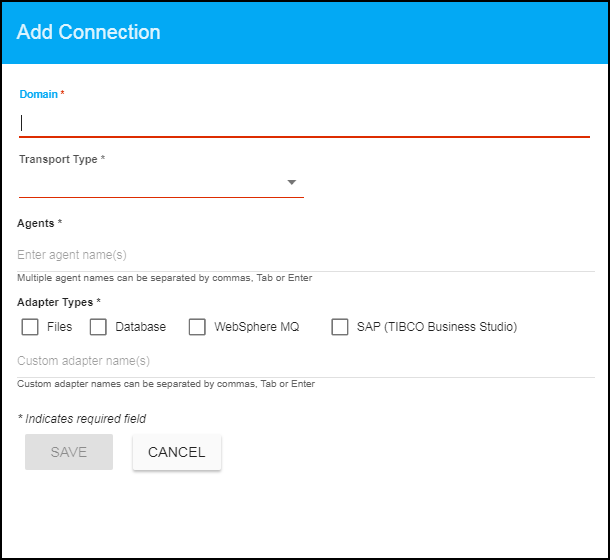
- For TIBCO Hawk domains running on EMS transports, specify the connection information and click Save where:
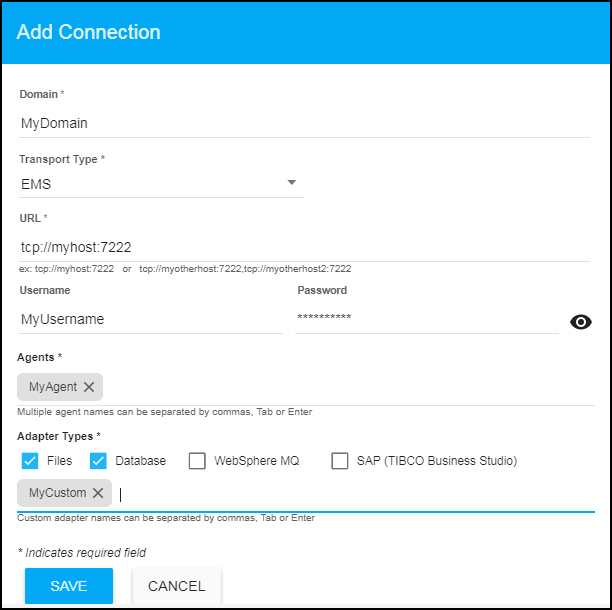
Domain: Enter the name of the domain.
Transport Type: Select EMS from this drop down list.
URL: Enter the complete URL for the EMS connection.
Username: The username is used when creating the EMS connection. This field is optional.
Password: This password is used when creating the EMS connection. This field is optional. By default, the password entered is hidden. Click the  icon to view the password text.
Agents: Enter the associated agents. The agent name displays in the field after entering the name and typing a comma or by clicking the Tab or Enter key. You can enter more than one agent in the field. Once the agent is specified, you can delete the agent by clicking the X next to their name.
Adapter Types: Select the type of adapter or enter a custom adapter name. You can specify any custom adapter types using the associated field. The custom adapter name displays in the field after entering the name and typing a comma or by clicking the Tab or Enter key. You can enter more than one custom adapter in the field. Once the adapter is specified, you can delete the adapter by clicking the X next to their name.
- For TIBCO Hawk domains running on Rendezvous transports, specify the connection information and click Save where:
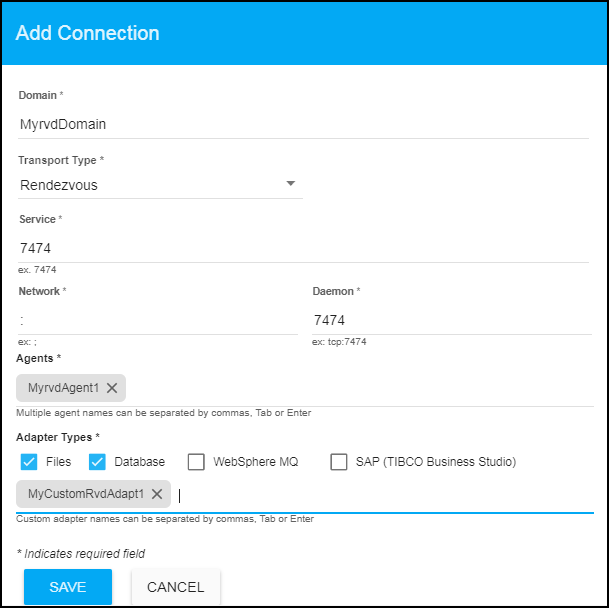
Domain: Enter the name of the domain.
Transport Type: Select Rendezvous from this drop down list.
Service: Enter the Service for the Rendezvous connection.
Network: Enter the Network for the Rendezvous connection.
Daemon: Enter the Daemon for the Rendezvous connection.
Agents: Enter the associated agents. The agent name displays in the field after entering the name and typing a comma or by clicking the Tab or Enter key. You can enter more than one agent in the fields. Once the agent is specified, you can delete the agent by clicking the X next to their name.
Adapter Types: Select the type of adapter or enter a custom adapter name. You can specify any custom adapter types using the associated field. You can specify any custom adapter types using the associated field. The custom adapter name displays in the field after entering the name and typing a comma or by clicking the Tab or Enter key. You can enter more than one custom adapter in the field. Once the adapter is specified, you can delete the adapter by clicking the X next to their name.
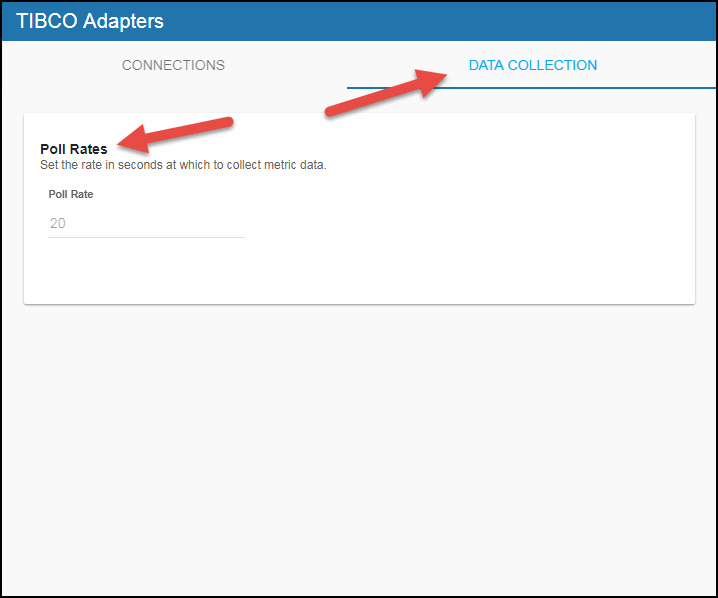
- Optionally, you can modify the default values for the update rates for the TIBCO Adapters caches (TadAdapterServiceInformation, TadVersion, TadHostInformation, TadStatus, and TadAdapterQuality) by updating the Solution Package Configuration > TIBCO Adapters> DATA COLLECTION > Poll Rates > Poll Rate field.