Building Your First Display in RTView Cloud
RTView's RTDraw allows you to quickly create flexible, customized displays that provide at-a-glance access to critical business operation data by dragging and dropping the objects from the left menu into the display. This document describes the basic flow for adding access to a data server that is collecting the data that you would like to monitor and then building a display that allows you to view the data.
Once you have completed the flow in this document, you can then create a dashboard that contains your new display that can be shared with others inside and/or outside your organization using the Publishing Your Display in RTView Cloud document.
Adding Access to a Data Server
Before building our displays, we need to add access to a data server (either an RTView data server or a demo server) so that we can attach our incoming data to our displays. For our example, we are going to add access to a demo server within our organization.
Open a browser, navigate to http(s)://rtviewcloud.sl.com, and log in. If you do not have an RTView Cloud account, go to http(s)://rtviewcloud.sl.com/register and follow the instructions to create your account.
Note: If you log in using https, you must use https for your data server links as well. If you log in using http, you can use http or https for your data server links.
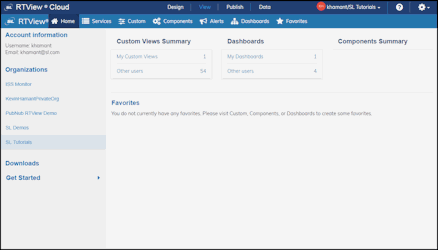
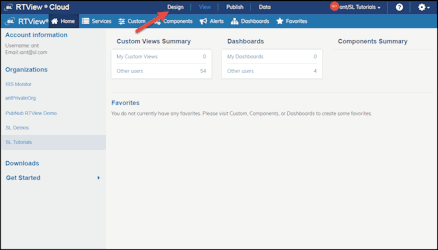
Once you have logged in, RTView Cloud displays.
Click the Data tab, and then click the Add Demo Server button.
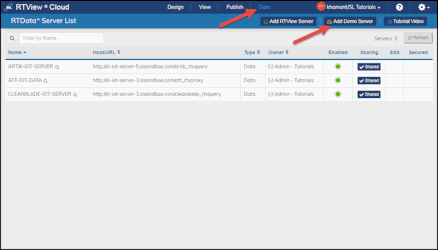
The Add Demo Server window displays.
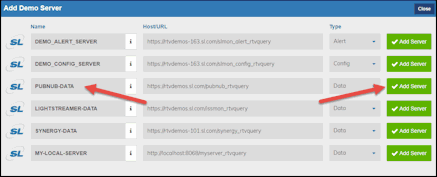
Click the Add Server button associated with PUBNUB-DATA.
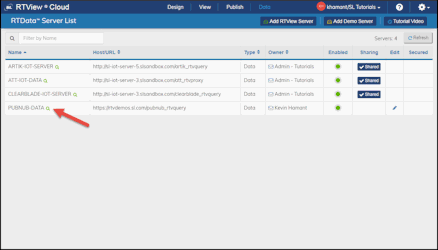
The PUBNUB-DATA server is added to the RTDATA Server List (the list of data servers that are accessible in RTView Cloud and RTDraw).
Note: The added demo server will only be available for use within the organization in which it was added. If you want to use the same demo server in a different organization, you will have to add the demo server in that organization as well.
Adding an Object to a Display
Next, we will be creating a display by dragging and dropping items/objects into our display.
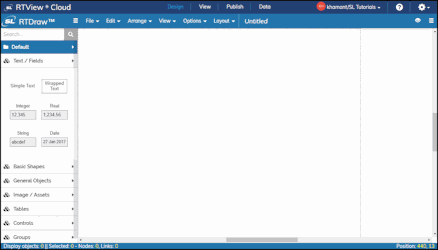
Click the Design tab at the top of the browser.
RTDraw displays.
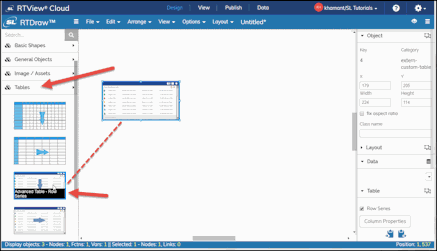
In the left menu (Object Palette), click Default > Tables > Advanced Table - Row Series and drag and drop the table into the new display.
Attaching Data to Objects
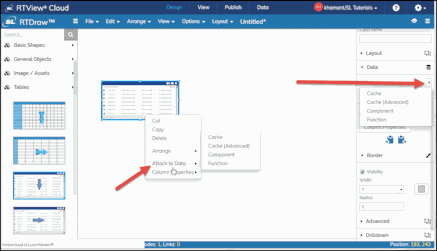
Once an object is placed into your display, attaching data to your object varies depending on the type of object. Some objects allow you to attach to data by right-clicking inside the object and selecting Attach to Data, other objects have a drop down list in the Data Properties (right side of the menu), and other objects allow you to attach to data by selecting the Value drop down in Data Properties. For example, for a simple table, you can right click on the object or you can select the drop down list in Data Properties.
The Value/Attach to Data drop down list allows you to connect an object property to any active data source, as well as to functions and variables. Based on your defined data source, the type of object/field and the option you select determines the additional fields that display on the resulting pop-up window.
For our continuing example, right-click on the table and select Attach to Data > Cache (Advanced).
The ATTACH TO CACHE_ADVANCED window displays.
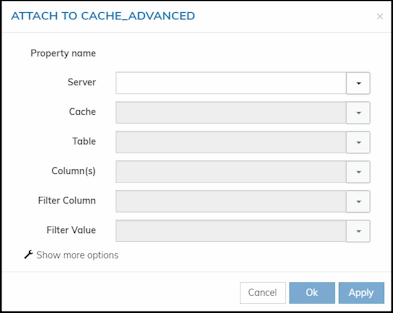
When you select the desired server from the drop down, the data associated with the selected server populates the Cache drop down list and, depending on which cache you select, will further display additional drop down lists.
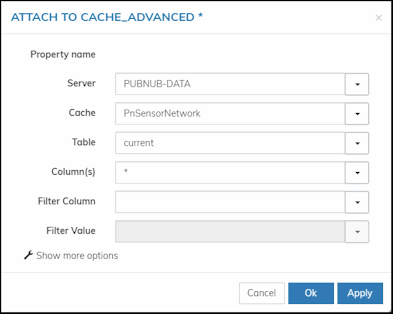
Select PUBNUB-DATA from the Server drop down, select PnSensorNetwork from the Cache drop down, select current from the Table drop down, select * from the Column(s) drop down, and click the OK button.
The data is attached to the table in your display.
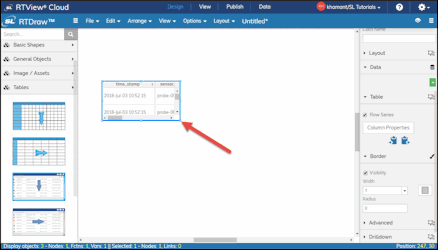
Resize the table by dragging the blue select handle on the table until you reach the desired size.
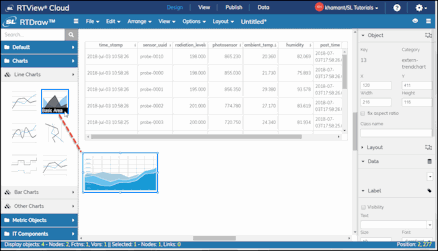
If you want to copy the same data attachment to a different object in your display, drag and drop a new object, say Charts > Line Charts > Basic Area, into the display.
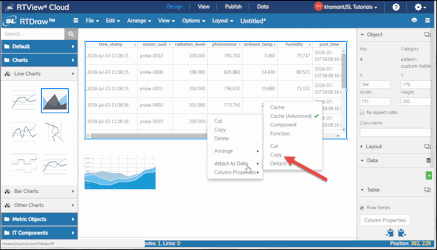
Right-click on the table (with the data attached) and select Attach to Data > Copy.
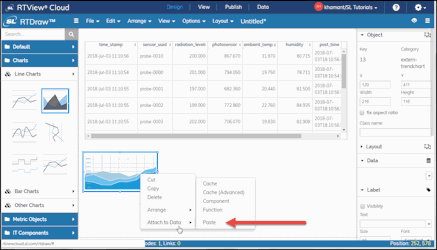
Right-click on the new object/item and select Attach to Data > Paste.
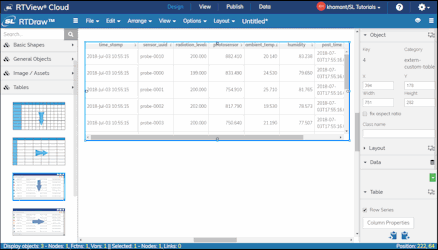
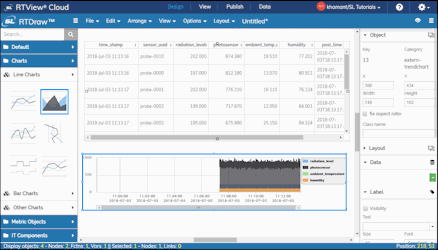
The data is now also attached to your newly placed item/object. You can resize the object to better see the data.
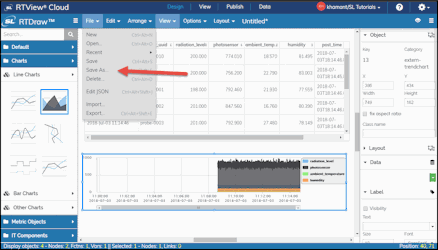
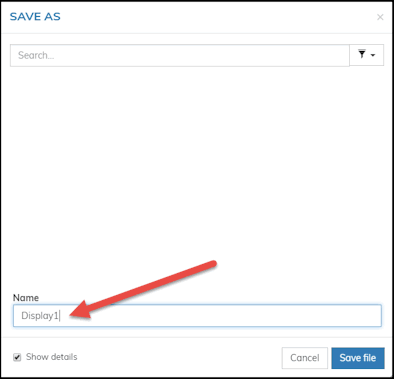
To save your display, click File > Save As to display the SAVE AS dialog, define a name for your display in the Name field, and click Save file.
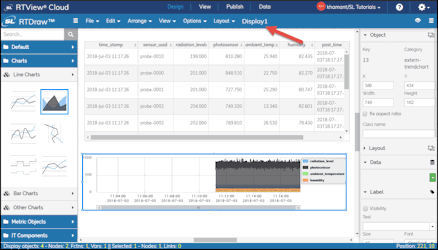
Your display name appears in the RTDraw top menu.
If you would like to publish your new display for others to view, see Publishing Your Display in RTView Cloud.