Using Functions in RTView Cloud's RTDraw
- Ted Wilson (Unlicensed)
- SL Docs
This section describes what functions are and how to create and use functions in RTDraw.
What are Functions?
Functions allow you to perform calculations on the data in the objects before the data is displayed. For example, you can create a function that will take the average value of a table column or add the values of multiple data attachments. To display the results, attach your functions to objects by right-clicking on the object and selecting Attach to Data > Function or by clicking on the drop down list in the Data object properties and selecting Function. See the example below for more information.
Adding Access to a Data Server
Before building our displays, we need to add access to a data server (either an RTView data server or a demo server) so that we can attach our incoming data to our displays. For our example, we are going to add access to a demo server within our organization.
Open a browser, navigate to http(s)://rtviewcloud.sl.com, and log in. If you do not have an RTView Cloud account, go to http(s)://rtviewcloud.sl.com/register and follow the instructions to create your account.
Note: If you log in using https, you must use https for your data server links as well. If you log in using http, you can use http or https for your data server links.
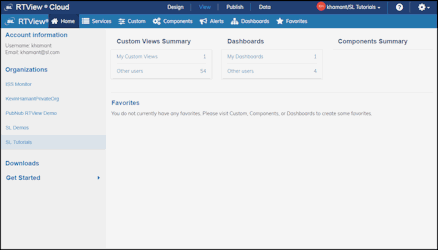
Once you have logged in, RTView Cloud displays.
Click the Data tab, and then click the Add Demo Server button.

The Add Demo Server window displays.
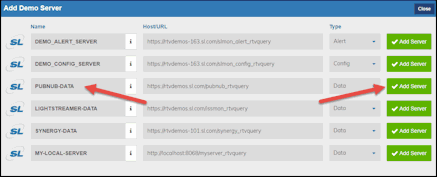
Click the Add Server button associated with PUBNUB-DATA.
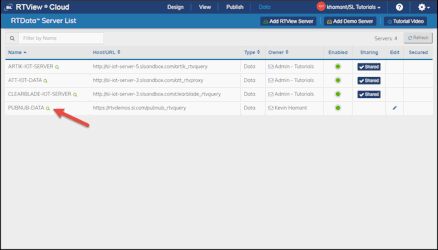
The PUBNUB-DATA server is added to the RTDATA Server List (the list of data servers that are accessible in RTView Cloud and RTDraw).
Note: The added demo server will only be available for use within the organization in which it was added. If you want to use the same demo server in a different organization, you will have to add the demo server in that organization as well.
Adding an Object to a Display
Next, we will be creating a display by dragging and dropping items/objects into our display.
Click the Design tab at the top of the browser.
RTDraw displays.
Select Default >Tables on the left menu, select the Advanced Table-Row Series table, and drag-and-drop the table into the display.
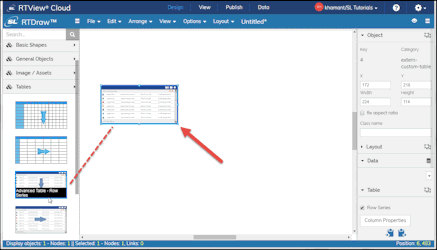
- Click the lower right blue “handle” of the table and drag it to the right to make the table larger.
Attaching Data to Objects
Once an object is placed into your display, attaching data to your object varies depending on the type of object. Some objects allow you to attach to data by right-clicking inside the object and selecting Attach to Data, other objects have a drop down list in the Data Properties (right side of the menu), and other objects allow you to attach to data by selecting the Value drop down in Data Properties. For example, for a our table, you can right click on the object or you can select the drop down list in Data Properties.
The Value/Attach to Data drop down list allows you to connect an object property to any active data source, as well as to functions and variables. Based on your defined data source, the type of object/field and the option you select determines the additional fields that display on the resulting pop-up window.
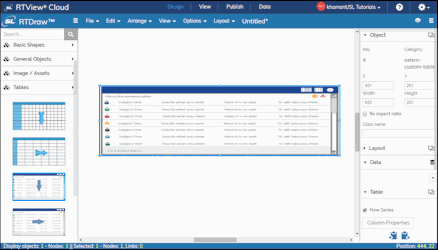
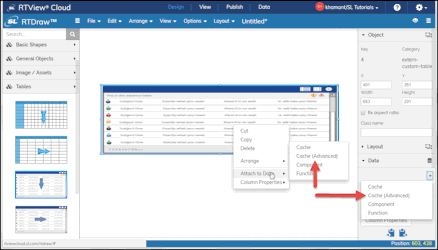
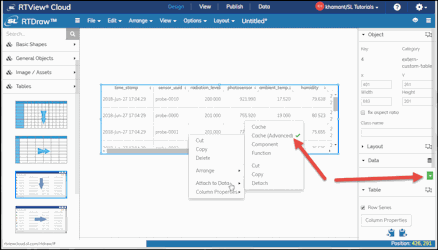
For our continuing example, right-click on the table and select Attach to Data > Cache (Advanced).
The ATTACH TO CACHE_ADVANCED window displays.
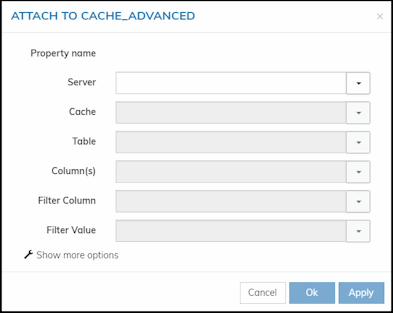
When you select the desired server from the drop down, the data associated with the selected server populates the Cache drop down list and, depending on which cache you select, will further display additional drop down lists.
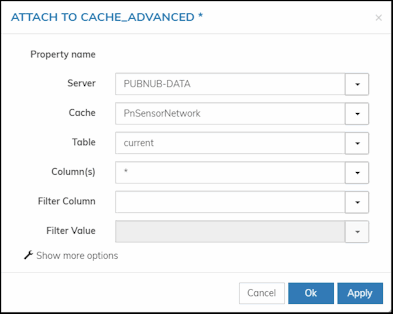
Select PUBNUB-DATA from the Server drop down, select PnSensorNetwork from the Cache drop down, select current from the Table drop down, select * from the Column(s) drop down, and click the OK button. Note that, for this example, we are selecting a cache that has multiple tables. We will be changing to a different table when we add variables in the “/wiki/spaces/ENG/pages/566919216” document.
The data in the cache for the table selected displays in the table object, and you will notice that the Data drop down arrow is green and that the Attach to Data > Cache (Advanced) options have a green check mark next to them signifying that there is an attachment.
Creating a Function
Next, we will create a function, add another object (Default > Text/Fields > Integer) to the display, and attach the function to the new object (Integer field). This example is the starting point to also help describe how you can use variables in combination with functions. See the “/wiki/spaces/ENG/pages/566919216” document for the continuation of this example.
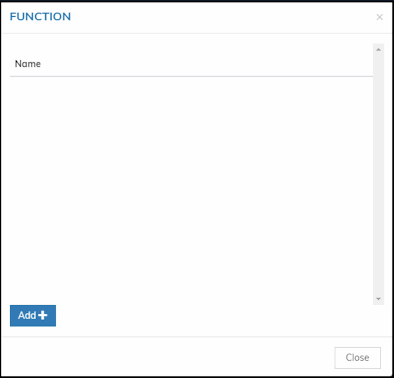
- To add a function, select Options > Functions from the RTDraw title/menu bar.
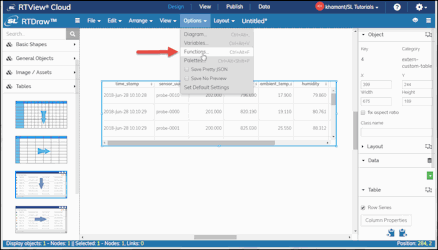
The Function dialog displays.
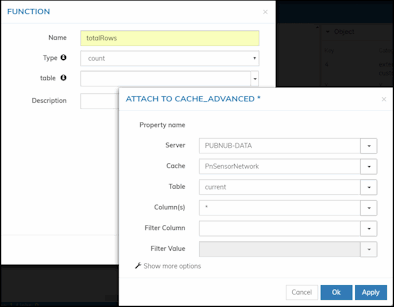
- Click the Add+ button, define the Name of the function (totalRows), the Type (count), and then click the table drop down list. Select Cache (Advanced) and enter the same Server, Cache, Table, and Column(s) options you entered in the ATTACH TO CACHE_ADVANCED dialog (when attaching data to the initial table), and click Ok.
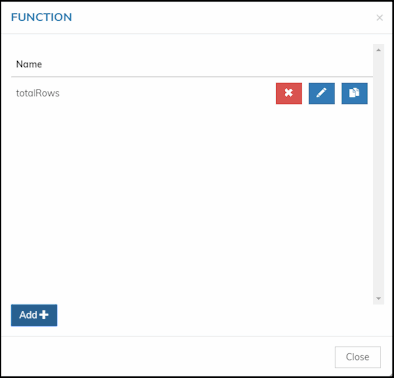
The function is created and listed in the initial FUNCTION dialog.
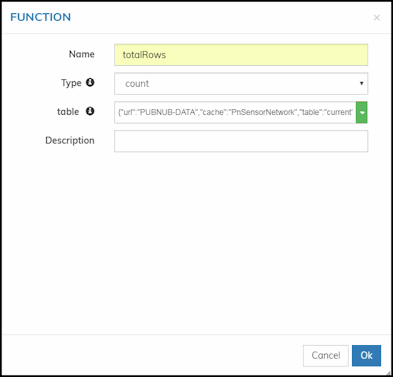
Click Ok. The newly created function is saved.
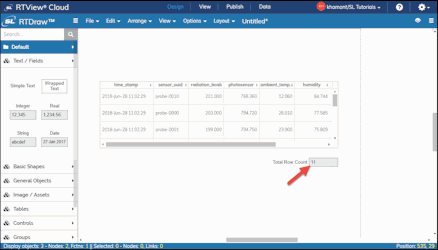
- Click Close and navigate to Default > Text/Fields in the left menu (Object Palette) and drag and drop Integer into the display and below the table.
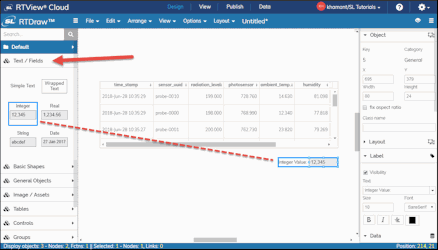
- Double-click in the left side of the integer object, or click in the Text field in the Label object properties and enter a title (for example, Total Row Count).
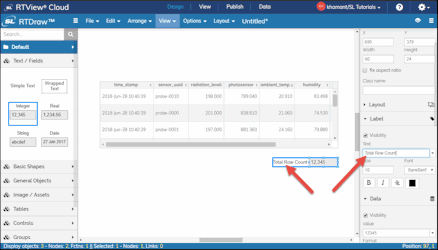
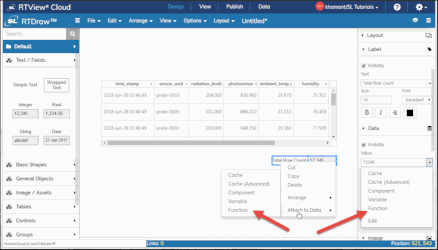
- To attach the function, right-click inside the Integer object and select Attach to Data > Function or click on the Data object properties drop down and select Function.
The ATTACH TO FUNCTION dialog displays.
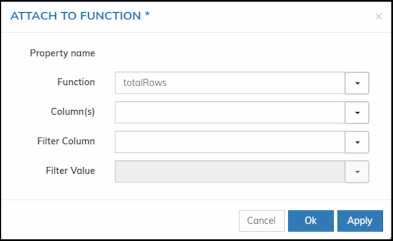
- Select the Function (totalRows) you created and click Ok.
The total count for the rows in the table should be updated to reflect the current rows in the table (in our example below, 11).
You can continue this flow to include the use of variables to see how you can update data in both objects in the display by updating a variable in the “/wiki/spaces/ENG/pages/566919216” document.